Introduction
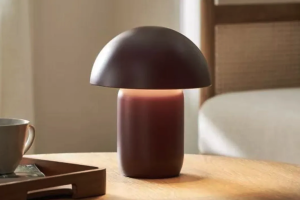
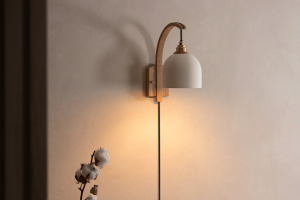
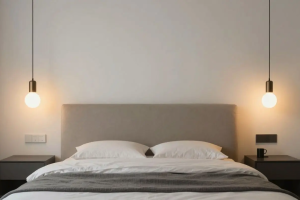
Are you looking for a simple and affordable way to add a touch of rustic charm to your home décor? If so, consider making your own easy handmade wooden lamps! With just a few basic woodworking tools and some simple materials, you can create unique and beautiful lighting fixtures that will add warmth and style to any room.
In this article, we’ll provide a step-by-step guide on how to make your own easy wooden lamps. You’ll learn about the materials you’ll need, the tools required, and the basic steps involved in creating these charming lighting fixtures.
Materials and Tools
First, let’s take a look at the materials and tools you’ll need for this project. These are the basic supplies required, but you can get creative with your choices:
Materials:
– Wood (choose a type that appeals to your sense of style)
– Lamp kit
– Light bulb
– Screws
– Wood glue
– Sandpaper
– Stain or paint
– Varnish
Tools:
– Jigsaw
– Drill
– Hole saw bit
– Clamps
– Screwdriver
– Paintbrushes
– Sanding block
Step-by-Step Guide
Now that you have your supplies ready, let’s dive into the step-by-step process of making your own easy wooden lamps!
Step 1: Choose Your Design
The first step in creating your own handmade wooden lamp is to decide on the design you want to use. You can choose to make a simple rectangular lamp, a curved lamp, or even a lamp with a unique shape that fits your personal style. Look for inspiration online or in home decor magazines to get ideas.
Step 2: Cut the Wood
Once you’ve decided on your design, use a jigsaw to cut the wood pieces according to your measurements. Make sure the pieces fit together snugly; you may need to sand the edges for a perfect fit.
Step 3: Drill the Holes
Next, use a drill and hole saw bit to cut the holes for the lamp kit and light bulb. Follow the instructions that come with the lamp kit to ensure that the holes are the correct size.
Step 4: Sand the Wood
After the cuts and holes have been made, use sandpaper or a sanding block to smooth the wood. Be sure to sand in the direction of the grain for a professional finish.
Step 5: Glue the Pieces Together
Apply wood glue to the edges of the wooden pieces and press them together. Clamp the pieces in place until the glue sets. If desired, stain or paint the lamp and let it dry.
Step 6: Assemble the Lamp Kit
Once the lamp has been glued and dried, follow the instructions that come with your lamp kit to assemble it. Screw the lamp kit into place in the appropriate hole and add the light bulb.
Step 7: Add Varnish
To protect your lamp and give it a shiny finish, add a coat of varnish. Use a paintbrush to apply the varnish evenly, making sure to get into all of the lamp’s crevices.